Categories
Main Storage

Kaby Lake (and Skylake) building tips: Enable XMP and Install NVMe drivers

A few days ago, all the parts arrived for a brand-new Kaby Lake Core i7-7700K build. Soon enough, a shiny black PC stood before me, assembled, and beckoned me to turn it on. And turn it on, I did. After marveling at how fast it booted, the first order of business was benchmarking!

There are a lot of benchmarks to run out there, but the one that I find fascinating is the program you can download from http://cpu.userbenchmark.com — The website takes data from each person who runs the benchmark and then loads the results into a giant database from which you, the user, can then compare your results against, including parts and processors that you don’t own.

When the benchmark program was run on the new Core i7, many scores came out on top, but a few were marked “performing worse than expected”. Fortunately, there were some easy fixes.
Categories
Main

Mini LED USB stick review

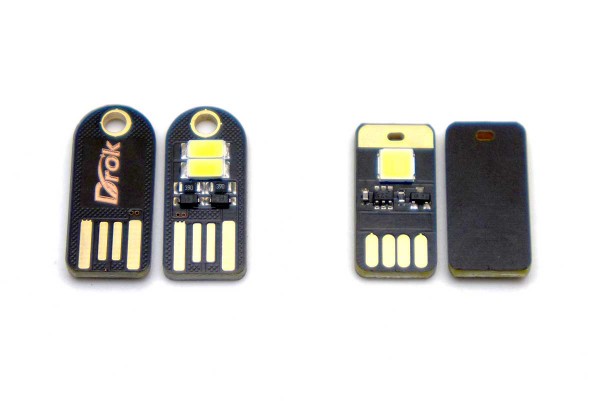
“Whoa. What are these?”, I said to myself. And as I looked them over, I realized that what I was holding was essentially just an LED soldered onto a little USB stick. “How useful!”

Mini-LED-USB-sticks-sidesSuch a simple concept with such a multitude of purposes.

  • Plug it into the side of your laptop for some additional light.
  • Attach one to a portable USB battery pack for an emergency flash light.
  • Plug one or two into the side of a USB power outlet for an ad-hoc nightlight.
  • Put one on the end of a USB extension cable and snake it into a hard to light spot.

And the nice part is that you can get a 4 or 5 pack of them for less than $10.

Let’s see how they perform!

Categories
Main

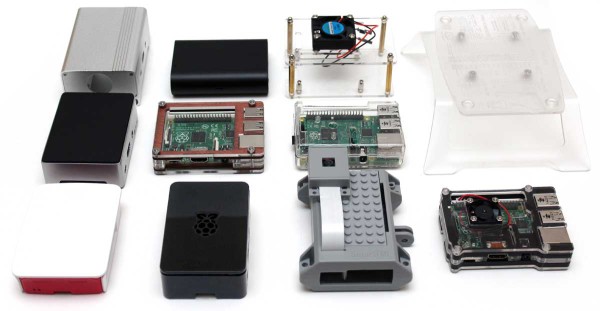
12 Raspberry Pi 2 & 3 model B cases — compared and reviewed

So you’ve got your Raspberry Pi 1 B+ or Raspberry Pi 2 or 3 B model, but you haven’t got a case for it yet. Or maybe you’ve got a case, but you want to “level up” to a nicer one. But which one to get? There are so many!

raspberry-pi-2-cases

And it’s true. There are a lot of RPi cases out there. We tried to get our hands on as many Raspberry Pi cases as possible. And here’s our review of 12 cases.

Categories
Main

The best Raspberry Pi 3 starter kits compared and reviewed

Update Mar-2016: Most of the kits in the review now contain Raspberry Pi 3 models. The kits themselves haven’t changed significantly (minor SD card and power supply swaps), but the RPi2 has been swapped out for RPi 3. 🙂

Update 20-Feb-2015: All kits have been updated to include Raspberry Pi 2 models! (except for the Make kit.)

The Raspberry Pi is an amazing low-cost computer. Unlike the ever-popular Arduino microcontroller, the Raspberry Pi was designed to be a full-blown computer from the start. It can run various flavors of Linux/Unix, act as a Media Center, and even moonlight as a Microcontroller.

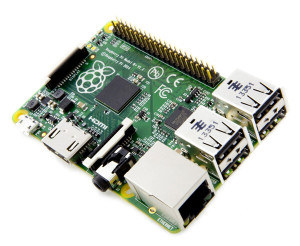
raspberry-pi-b+-boardAnd what better way to get started with a Raspberry Pi than with a starter kit? The question is: which one to get?

Categories
Main

The best Arduino starter kits compared and reviewed

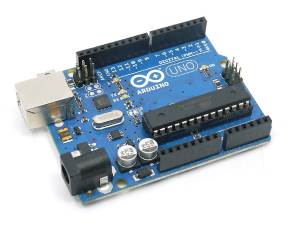
The Arduino is arguably one of the best things to come to the “Maker” Renaissance that we are currently experiencing. The Arduino is a simple microcontroller that can allow the one who wields it great power and programmatic control over their electronic circuits and systems. Yet to be a great wizard of such things, one must start at the humble beginnings of the very basics.arduino-angledWhat better way to get started than with an Arduino starter kit? That’s the trick, though, isn’t it? There’s more than one starter kit out there!

Categories
Main

Exploring the Netduino #4: Make LEDs *really* Glow (or: Fun with PWM)

In our last entry, “Exploring the Netduino #3: Building the circuit on a Breadboard“, we covered the step-by-step method to wire up the proposed schematic for switching an LED on and off via a power MOSFET. In this entry, we are going to get to the fun stuff: CODE!

But first, a little bit on LEDs

Light Emitting Diodes (LEDs) may function a lot like (incandescent) lightbulbs, but they should never be treated like them. Like lightbulbs, LEDs can be dimmed by controlling the forward voltage. Unlike light bulbs, this range tends to be rather narrow and as such is somewhat difficult to control. Fortunately, dimming LEDs can happen another way that is particularly easy to do with a digital circuit: Pulse Width Modulation (PWM).

Categories
Main

Exploring the Netduino #3: Building the Circuit on a Breadboard

In “Exploring the Netduino #2: (Indirectly) Driving an LED“, we covered the electronic theory of how to use a Power MOSFET to turn the LED On and Off via a digital signal. In this post, we are going to walk the reader step-by-step on how to wire-up the circuit on a breadboard. If you’re using an Arduino, the steps are exactly the same.

As mentioned previously, you will need the following equipment and parts:

  • An electronic breadboard
  • A few common LEDs (like 5mm Red)
  • A couple resistors (a 1 MOhm and a 68 or 100 ohm)
  • N-Channel MOSFET (like RFP30N06LE)
  • A 3.3v power supply or a 2-cell AA Alkaline battery pack (3v)
  • Some jumper wires to connect the circuit together
  • Multi-meter (optional)
  • And a Netduino or Arduino, of course!
Categories
Main

Exploring the Netduino #2: (Indirectly) Driving an LED

In “Exploring the Netduino #1“, you may recall that it was suggested that the reader take a look at the Netduino “Getting Starting” guide found on the Netduino.com site to get a feel for the hardware. The guide walks the user through a “Hello, World” equivalent where the  user ends up getting the blue on-board LED to blink on and off. This tutorial aims to pickup where that guide left off.

Over the next few posts, we will cover how to wire up an LED to control its brightness using the Netduino’s Pulse-Width Modulation (PWM) features and supporting electronic circuitry.

Categories
Main

Exploring the Netduino #1: Takin’ her for a Test Drive

From the last post on Exploring the Netduino, we learned that the Netduino is a lot like the Arduino Uno in physical and electrical aspects, but the Netduino has a few advantages in its court: ~3 times the processing power, 32-bit ARM7, and nearly 30x the RAM. But it was also noted that the Netduino runs a slimmed down version of the .NET Micro Framework (NETMF) which naturally will require more overhead than the native binaries that are compiled down tightly for the Arduino Uno’s ATmega328 8-bit AVR processor.

If you have a Netduino (or are thinking of getting one) and have not yet tried out (or looked at) the Netduino “Getting Starting” guide, I recommend reading it. It walks the reader through setting up their development environment and then writing a simple “Hello, World” type program which gets the little blue light on the board to blink. Unfortunately, this introduction is quite limited and might leave you saying “Well, blinking a blue light was fun, but what next?” Glad you asked!

Categories
Main

Exploring the Netduino #0: Kickin’ the tires

Every tech head with an interest in PICs and Microcontrollers out there knows about the Arduino phenomenon by now. As described by the Arduino folks themselves:

Arduino is an open-source electronics prototyping platform based on flexible, easy-to-use hardware and software. It’s intended for artists, designers, hobbyists, and anyone interested in creating interactive objects or environments.

Except for those of us who spend the bulk of our time in a modern “managed” code environment like Microsoft’s .NET — Sure, we all got started on languages like ASM, BASIC, C and C++, but having graduated to these higher level languages like C# and Java, it’s really nice to have a modern, intelligent IDE (like Visual Studio) to work with and not have to worry about things like malloc() and garbage collection.

Enter: the Netduino

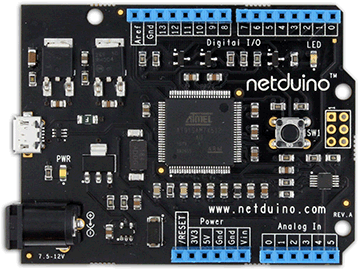
The Netduino